How to fit an SKF Cooper Bearing
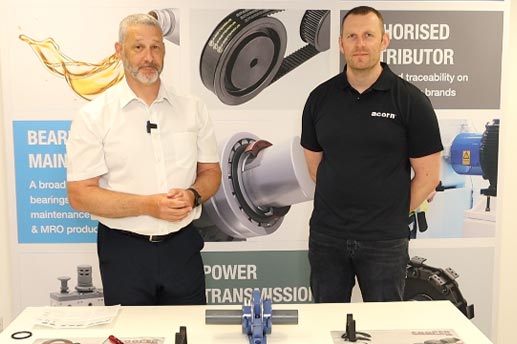
Acorn's Bearing Product Manager, Andy Fletcher is joined by SKF Cooper's Regional Sales Manager, Clive Jennings to demonstrate how to assemble a Cooper split-to-the-shaft bearing.
Video Transcript:
"Andy: Hello, we’re here today with Clive Jennings from SKF Cooper and he’s going to be talking us through best practice mounting procedures on an SKF Cooper Roller bearing
Clive: Thank you very much Andy, what we are going to go through Andy today, when your customers buy from you a cooper split bearing inside each bearing is the assembly instructions so this what we are going to be going through today as a best practice.
Clive: Ok se we’ve got here my 50mm demo unit, so we start off by measuring the shaft for roundness and size in 3 or 4 different places
Andy: What sort of accuracy do we need to be measuring on that Clive?
Clive: Ok so it does tell you in the fitting instructions for your size of shaft what the accuracy is but as a rule of thumb you don’t want to be plus anything and minus about two, thou. If your much more than that, the two halves of the inner races will touch, and they won’t clamp on the shaft properly.
Andy: Ok so this is to ensure safe fitting of the inner ring
Clive: Exactly yeah so its quite a critical part that a lot of people don’t do but it’s worth taking the time to do it. So now that we’ve established that our shaft is the correct size and it’s round and parallel, we then want to lightly grease the shaft okay, this doesn’t want to be a thick viscosity oil, because a cooper bearing has no adjustment, it’s all pre-set and clearances are pre set if we use to thick a grease, we can take away some of the clearance
Andy: Would the grease prevent rust or any fretting damage that might occur?
Clive: That’s exactly why we do it Andy, yeah exactly those two reasons
Step 1: Fitting the Innter Ring
Clive: So, once we have applied a small amount of oil to the shaft, we take our two halves of our inner rings, and you’ll see one these that one side has a black line, and one doesn’t this is so you can match them up when you put them together okay. All of the Cooper bearing components have identification markings on them – and you’ll see they’re different numbers, but they’ll always match the half that they are with.
Andy: Ok, so if you’re assembling 2 bearings at the same time, you need to keep the components completely separate
Clive: Yeah, you can and in case you do mix them up, you will have the identification numbers to tell you that those two halves go together. I should mention that when you buy a bearing that is a matched set, and you shouldn’t interchange any of the parts from one bearing with another
Andy: Ok that’s good practice
Clive: Ok so we are going to fit our races on the shaft. Ideally what we are looking for when we get these on is that we want a nice even gap, and you can see here that we have a gap and we have less of a gap this side, so we are going to even that out. It doesn’t have to be identical, but it is a best practice to make sure the gaps are even, as long as you have a gap on both sides, it doesn’t matter if you have a big gap and a little gap, as long as you have a gap.
Andy: Ok, so that helps with, erm, to be honest I’m struggling to think of what that helps with
Clive: The reason we do that Andy, is that when we make the bearing, we make it from round bar, and the final stage is to cut it so it’s not quite round, if you had one side touching the edges would start to wear and chip
Andy: Ah I understand, so again it’s a safety measure to ensure best life
Clive: It’s exactly that yep
Step 2: Fitting the Clamping Rings
Clive: So, once we’ve got out inner race on and we are happy we take then our clamping rings and we have two and you’ll see from here that there is a shoulder on one side and not the other, and this shoulder should be facing in so what we want to do is put the splits on at 90 degrees to the split on the inner race.
Andy: Does it matter which way round you put the collars on
Clive: Well, you can do it either way Andy but what I would personally as there is a female and male – the one half that you are screwing the screw into I would mount that first o the top as I have done so here, so as you rotate that round to put the other half on, you’re actually screwing the screws from the top and not the bottom
Andy: Ok
Clive: It just makes assembly a little bit easier, again, you don’t have to, but it just makes your life a little bit easier
Andy: I also notice that there is a slight rib on one side of the collar
Clive: Yep, that’s right, that’s where the rollers run against on the roller and cage assembly, if you assemble it with the rib on the outside, you’ll soon spot it as you won’t be able to get your roller assembly on later
Andy: Ok
Clive: So, I’m just gonna do these up slightly, again we are looking for a gap on each side of the clamping rings, but it is important to ensure these clamping rings are seated so we need to make sure we give them a little tap with a dead blow mallet or a soft mallet, to make sure they’re seated. If not when we tighten them up fully when they’re not fully seated, when the machine runs it can move and they’ll be loose okay, very important little tip that one. Ok so that’s that side, we’re gonna do the other side
Andy: And the same process exactly the same again
Clive: Exactly the same repeated again
Andy: You make this look very easy Clive
Clive: Well one of the beauties of a Cooper bearing Andy is that it is very easy to put together, the fact that there is nothing to adjust and no clearances to set, makes it a very easy bearing to put together. So, again just tighten those up slight and I’m going to make sure they’re seat and then I’m going to give them their final tighten. You’ll notice in the fitting instructions that for every size of screw that you’re fitting, there is a torque setting on there to make sure you get the right torque on them.
Step 3: Measuring the Grease
Clive: So, at this point any I would measure the grease, and working that pout we have again with the fitting instructions your shaft size times speed gives you a dm rating and that tells you if you want a full pack, a three-quarter pack, a half pack, or a quarter pack. And then in the calculated algorithm you’ll see that it gives you a value for the size of bearings what weight of grease you want
Andy: Ok so depending on the application you’re using this bearing, will define what amount of grease you need
Clive: Exactly so for slower applications you want a little more grease, and for faster applications you want a little less.
Andy: Ok that makes sense
Step 4: Fitting the Outer Races
Clive: Ok once we have weighed our grease out, we are then going to fit our outer races into our cartridge halves and you’ll notice that the halves are slightly different, one has a locating pin and a grease nipple, and one does. And then on the races that are going to fit inside, you’ll notice that one has a hole in. Which one goes in the top, which one goes in the bottom Andy?
Andy: Well from common sense the one with the hole in would go near the grease nipple
Clive: Yep, you’re exactly right, so we need to be making sure that we are fitting this one into the one with your grease nipple. One of the things you need to be careful as I’ve said is that a cooper bearing has no adjustment, we need to make sure that when we are fitting the outer races that the seating area is clean and free from any debris, we don’t want any grit or dirt in there as it may affect the clearance that you have. So, make sure it’s clean, give it a wipe and then all we do is slide it into position okay, nice and simple. Doesn’t have to be perfect as long as it’s slid into position. Then we take our other half and slide that into the bottom, we just want to make sure where our male and female halves, you’ll notice that we have different angles on there that they’ll fit together when you put the cartridge together and again just slide it in. Then we are going to take the two halves of the cartridge, obviously you can’t always do this for some of the larger size bearings, but we’re going to then put the screws in. As you can see at the moment I have gaps in the cartridge, and we just want to eliminate those gaps.
Andy: So, you are at this point ensuring that the cartridge and the outer ring are set together
Clive: Yeah, ok so it’s making sure that they’re seated correctly, also as a check point for us, once we have screwed this together and we have eliminated the gaps in the cartridge, we know that when we come to fit the cartridge into position if there’s a gap it’s because we have done something slightly wrong, it’s not seated correctly
Andy: Of course, yeah
Clive: So let me just screw those in, and you can see now we have no gaps in the cartridge
Andy: That’s a fantastic best practice idea to do as a good check
Clive: Yeah, it’s just making sure you’re getting the best life you can out of the bearing
Andy: I’ve just noticed these holes Clive, what are they for?
Clive: Ok so this is a GR bearing, which is our fixed bearing, it means grooved race, and these little screws that we need to tighten up at this point here, locate the GR outer race in position. Again, we do all those up, we know now then that this outer race is in the correct position. So, when we come to fit this cartridge now it should be perfect.
Clive: At this stage we’re going to fit the seals as well and on this one we have got felt seals. Felt seals come as our standard seal with the bearing and they come free with every cartridge that you buy and then you can buy extra seals afterwards. They come as one pack, one set of seals and there’s four little pieces of felt seals in each pack.
Andy: Is there anything special that we need to do with those felt seals to fit them
Clive: Yeah, ok so ideally when we know we are going to fit the bearing, twenty-four hours before we fit them, we want to be soaking these felt seals in oil, they’re a more effective seal when they’re wet. Obviously not everyone does that so if you can remember at least when you start assembling the bearing soak the seals for as long as you can. In this case we have already fitted them, with each felt seal they are slightly longer than they need to be so you will just have to trim them off slightly. If we were going to fit a triple labyrinth seal, at this point you would fit it on the shaft as well so when we fit the cartridge it’s in position.
Andy: Ok
Step 5: Fitting the Roller Cage Assembly
Clive: Now we are gonna fit our roller and cage assembly. This is very easy on this particular design as we have a male and female cli that go together, and it just very easy just hold the two halves of the rollers and squeeze and it comes together. To remove you see a little gap, you just twist a screwdriver, and it comes apart, very simple. So, with the grease that we have measured out already, we take a bit of grease and smear it on the inner race in here and as much grease as we can between the rollers and cages, you’ll see there’s lovely deep pockets on this design to hold some of the grease and obviously on the inside of the bearing.
Andy: So that’s to ensure a correct EHL film on the bearing during operation.
Clive: Exactly, where we want the grease is on the inner race and the rollers, so we don’t get and metal to metal contact. Any grease we have leftover can be fill into the cartridge after, but you want to get as much grease as you can onto the rolling elements. So, we’ll roll this into position take our other half and again, we are just squeezing that together. Okay so that’s our bearing fitting to the shaft.
Clive: Next step is to fit the cartridge
Step 6: Fitting the Cartridge
Clive: What we are going to do here then is take our bottom half of the cartridge, sit it on top of the bearing and rotate it into position.
Andy: And this is exactly the same procedure for the fixed type or the expansion type?
Clive: Yes, the only difference is with these GR screws that we adjusted earlier.
Andy: Okay
Clive: So, at this point now we would take whatever grease we have left and fill it into the hole in the cartridge and maybe in the top half as well. We are then going to fit the top half of the cartridge on, and because we adjusted it earlier and put it together, we’ll know, when we screw this down if we’ve got a gap it’s because it’s not quite seated correctly so we don’t want to be hitting it and trying to get it adjusted on there, we know that we just have to take it off and put it back on again to make sure it’s seated.
Andy: Ok
Clive: Again, we would do the screws up with the correct torque rating for each screw
Andy: Which is given in the instructions we spoke about earlier
Clive: Exactly, yeah
Step 7: Fitting the Pedestal Cap
Clive: Then all we have left to do is put on the pedestal cap. And as with all the components in the bearing and housings, we have identification markers on there to tell you which half goes with which and how they go together
Andy: So, you can’t get it the wrong way round
Clive: Exactly, so once this is on, most people think you’re finished there Andy, but do you know what one more step might be?
Andy: Is it to do with the misalignment of the bearing?
Clive: Absolutely, perfect that’s it yep, absolutely right. So, we are just gonna do these two cap screws up finger tight and then, if possible, we want to allow the machine to rotate for 30 seconds or so this can find its centre. There’s two and a half degrees of misalignment in any direction with a Cooper bearing so five degrees total, and we want that to find its own centre. Then once it’s found its centre, we tighten it up. If we can’t run the machine, we want to be doing at least is rotating this by hand five, ten, fifteen revolutions so it finds its centre.
Andy: So, by finding it’s natural centre it gives the bearing the best chance of a long-prolonged lifetime
Clive: Exactly right, and there you have it.
Andy: Fantastic, thank you Clive.
Clive: Thanks Andy."